Saturday, February 13, 2016

Snippets

Snippets, 2016
Cotton Fabric

At our last ATHA meeting, Judy demonstrated creating pieces with snippets of fabric.  We used fusible pieces of fabric to make art pieces - sort of painting with fabric.  Here are the two pieces I finished using the fabric she brought for our class. Finished pieces could be quilted, embellished, framed, used on cards, or in any way you choose.
Judy brought along this book by Cindy Walter and it is a great resource.  I love the pieces on her cover, The Kiss and Water Lilies at Giverny.  Cindy has a series of books that expand on her technique and they can be found at a very reasonable cost on Amazon.

Sunday, January 31, 2016

Another Stamp

Hand Carved Stamp, 2016
Speedy Carve, Speedball cutters #1-3 & #5

This little stamp was carved to use repeatedly to create a larger design.

Saturday, January 30, 2016

Hand Carved Stamps

Hand Carved Stamps, 2016
Speedy Carve, Speedball cutters #1-3 & #5

Still having fun cutting stamps.  These will probably be used in a mixed media piece or on notecards.


Friday, December 18, 2015

Snowman

Quick Project
#4 and 5 Wool Strips on Linen

This is the little project I'm working on at present.  I needed something quick and fun to work on in the evening to satisfy my want to hook without adding another big project to my list. (I'm procrastinating my gift wrapping!)  This pattern came in an order from Dorr Mill last Christmas (there is no artist name on the pattern) and I had forgotten all about it.  In going through my closet stash the other day, I came across this little snowman and thought it fit the bill. What is hooked in the picture is the entire circular pattern, but I've already started adding an additional border to make the piece a little larger.  The original pattern had a diameter of about 10", but if I add a border I can make yet another pillow.......  

Saturday, December 12, 2015

Again

Primitive Dolls

This book is a great resource for the primitive doll creating process.  Barb Moore's dolls are more primitive looking than those in Prims as you can see in this photo of page 10 in Purely Primitive Dolls:

Barb's book takes you through the entire process: choosing fabrics, how to create a pattern, transferring your own pattern to the fabric, cutting and sewing, stuffing, creating a face, grunging, dressing your doll, and types of accessories for the finished product.  
I'm not sure what drives me to like these.  The fact that I like old items with a history (and these dolls look as though they are vintage).....or that the folk art dolls look so forlorn that you want to give them a home.  They would certainly be conversation starters....  Barb Moore writes: "There is something special about creating your own dolls.  That doll will be your own, and it will hold a piece of your heart." (page 4, Purely Primitive Dolls)

Friday, December 11, 2015

Primitive Dolls


Primitive Dolls

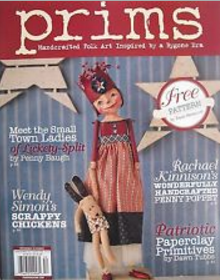
I'm always checking out artists' work on the net and have often been mesmerized by some of the pieces on the Primitive Handmades Mercantile, especially the primitive dolls on My Old Crow Primitives, The Red Cupboard, Bay Ray's Child, and Prairie Prims.  After mentioning my interest to a friend, she lent me some Prims magazines (I'd never seen this periodical before), and these have only fed my desire to give doll making a try.  Prims comes out 3 times a year.  Most of the dolls that are featured are created to look old and well worn with body shapes and limbs that are crude and clothes that are stained.  The bodies are made of muslin using simple patterns, stuffed with old rags, features are added, and then the dolls are"grunged" or painted.  A "grunge" solution might be made of coffee, tea, vanilla, and cinnamon (artists' formulas vary somewhat).  The concoction is heated to thicken it, then brushed on the muslin.  After the doll dries, it might be lightly sanded to give it the worn look.  Clothes are made and stained with tea or coffee.
In the spring/summer 2015 edition there is a pair of worry dolls that are very simple and seem like a good place to start.  Trudy Honeycutt, the artist, provides a pattern and technique suggestions. I'll give it a try and see if I like the process and the results.


Monday, November 23, 2015

Canadian Creative Stitches

Class Project

Hooter the Owl, 2015
Wool strips on linen, 12" x 14"

This piece is a project from the class Canadian Creative Stitches taught by Benita Raleigh (highly recommended). The stitches are borrowed from crewel embroidery.  They are hooked by counting stitches and rows (which I was a little lax about after the initial beginning of the pattern).  My patterns were hooked with a #5 cut.  The cut ends are to be left on the back of the piece, but because I want to use this piece as a pillow that will get daily use, I pulled many to the front as I would in traditional hooking.  Some of the stitches are chain stitch, weaving stitch, reverse brick, chess stitch, chevron, cobblestone, and beaded stitch.  Benita states that the stitches are more obvious when you use contrasting colors or at least different values of the same color family.  She recommends that when using these stitches in your work there has to be a balance between using the creative stitches and regular rug hooking stitches.   When I started the piece I was not concerned with what I'd put in the background.  A plainer background may have accentuated the stitching more, but I opted for clouds and the moon.   This was a fun class.